The Inspired Makers throw down a monthly challenge and for our September challenge we’ve taken on (once again) the $100 Room Makeover! All it takes is $100, and 1 room needing an overhaul, update, refresh, restyle, or makeover. As always, follow along with #inspiredmakers and #inspiredmakerschallenge!
I was able to stay within budget when I did my Master Bedroom Closet Makeover and my Teenage Girl Bedroom Makeover so I figured it wouldn’t be a problem to stay within budget by doing a Glamper Living Room Makeover but I was wrong. I went over budget by $10-15 and I still need to finish a few things. Regardless, I am sharing my Glamper Living Room Makeover today and I am thrilled with the results thus far.
Make sure you stop by and visit the other Inspired Makers as they are sure to get your creative juices flowing with their budget friendly room makeovers.
The Purple Hydrangea – Powder Room Makeover Under $100
1915 House – Small Budget Big Makeover Dining Room
Duct Tape and Denim – $100 Bathroom Makeover
Pearl Street Designs – $100 Home Office Makeover
My Thrifty House – Glamper Living Room Makeover
Shop At Blu – $100 Bathroom Makeover
Farmhouse Made – Affordable Dining Room Refresh… for $100
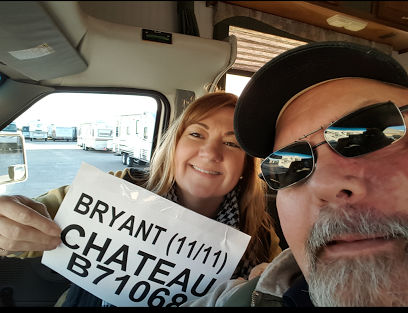
We purchased our used RV (aka The Bryant Chateau) last November with the intentions of doing a full remodel and create the ultimate glamper (aka retirement home on wheels). After the Mister did his mechanical inspection and tune-up I immediately made the My Thrifty Glamper makeover list.
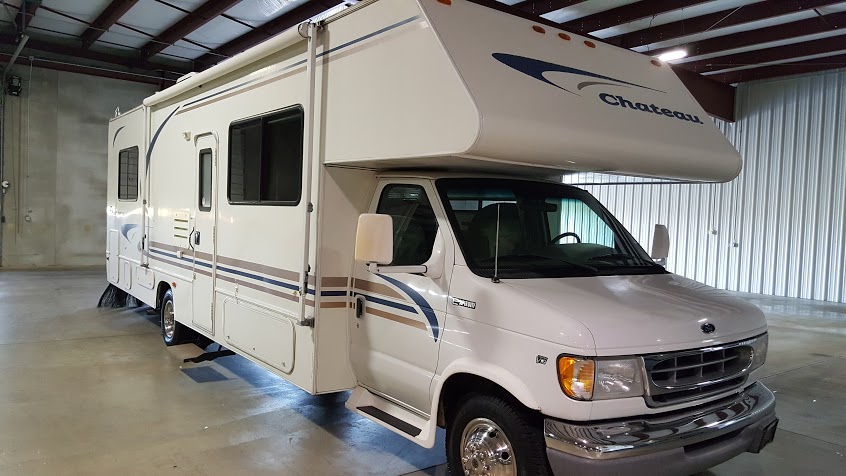
This glamper living room makeover is the first major project we have done since we purchased the RV. The number 3 item on my makeover list is “paint everything” and I can’t get more specific than that because the walls, cabinets and ceiling need some serious help.
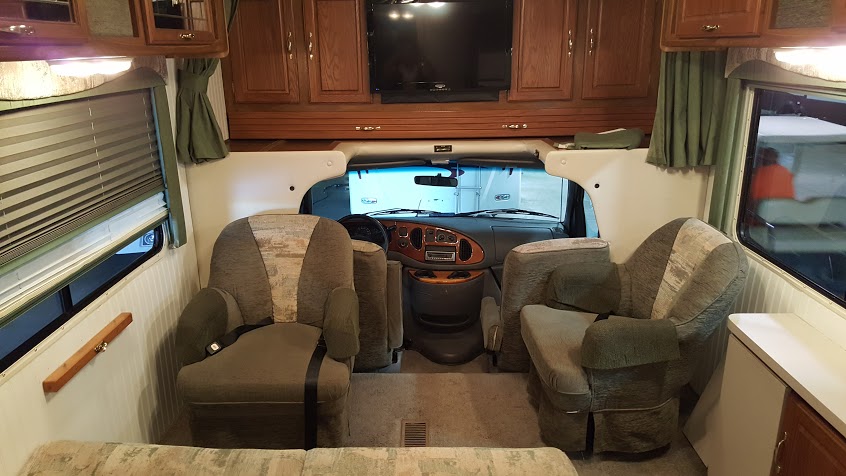
(Before pic of the brown cabinetry, sage furniture and disgusting carpet.)
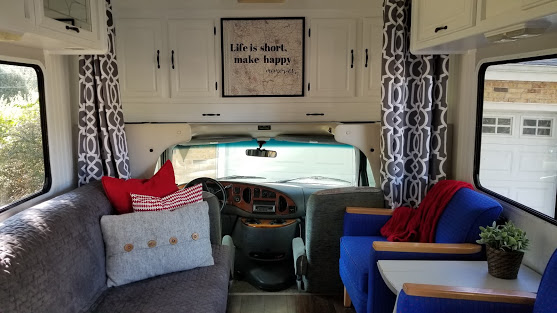
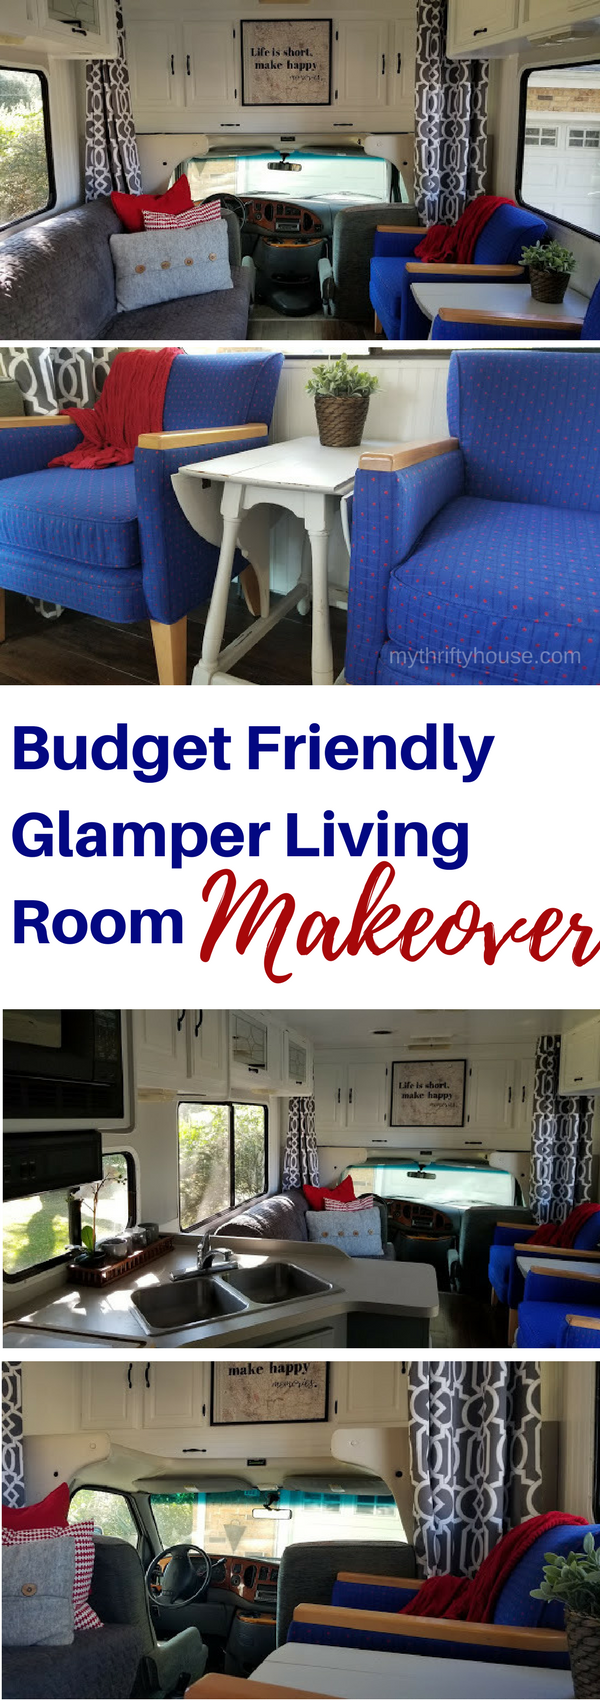
(After with white painted cabinets, Ikea couch and vinyl plank flooring.)
We purchased a $25 gallon of Behr white paint with primer from Home Depot for this makeover and I didn’t even look at the color chips. White is white when it comes to a glamper living room makeover and quite honestly, anything is better than cheap brown cabinetry not to mention that I really didn’t have the patience or time to compare shades of white paint.
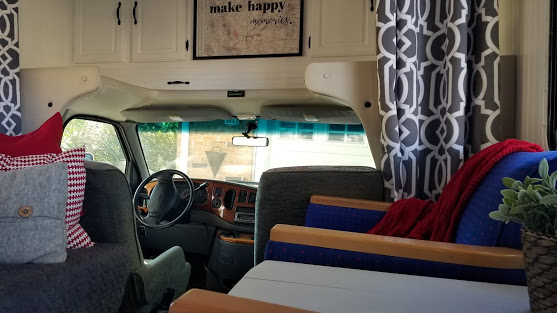
(Above the cab is a slide out twin bed and storage. My map art sign covers the hole where there used to be a TV.)
Prior to painting we did a thorough cleaning, sanding and wipe down of the ceiling and cabinets. The cabinet frames are particle board with laminate and the doors are real wood. We also opted to reuse the gold hardware and give it a coat of black spray paint because there are over 20 drawer pulls and knobs between the kitchen and the living room not mention all of those hinges too.
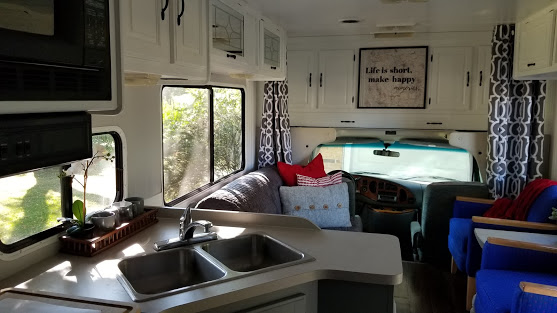
(View from the kitchen towards the living room/ dining room and spare bedroom.)
Next we worked on the flooring and started by removing all of the disgusting sage green furniture, dirty carpet and horrible window coverings. I can honestly say that the dark fake wood cabinets bothered me but the disgusting dirty sage green carpet literally made my skin crawl.
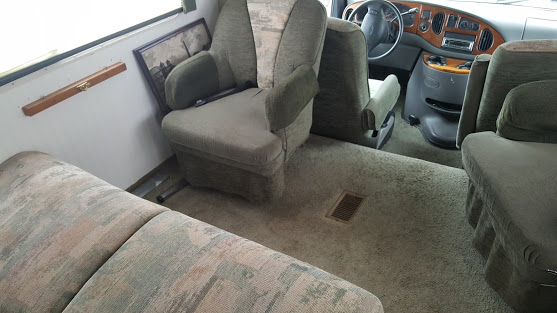
(Before pic of sage carpet and furniture in an odd configuration where the couch stuck out into the entrance.)
Surprisingly, the disgusting carpet came up with ease after we spent hours drilling out the bolts that held down the chairs. We headed straight to Lowe’s to inventory their vinyl plank flooring options and chose a self sticking brown plank called Woodland Oak. I opted for the brown floor because I figured it would be a nice contrast against my white cabinets, grey walls, red accessories and blue chairs.
This is the exact peel and stick vinyl flooring we purchased in the color Antique Woodland Oak and I can’t stress how easy it was to install.
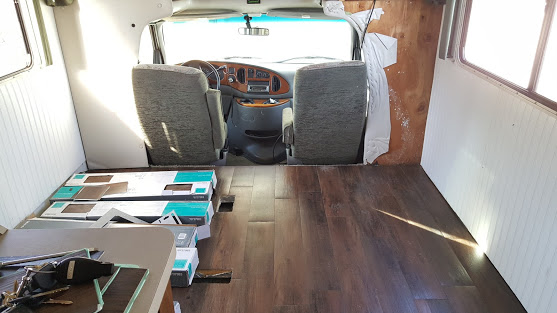
(We removed all the furniture and nasty carpet and put down the self sticking vinyl planks.)
We bought the vinyl plank flooring and immediately began laying it down after a thorough cleaning, sweeping and vacuuming of the plywood surface.
*Lesson learned: we should have painted the plywood surface with brown spray paint before putting down the planks because they shifted and moved after our last trip causing gaps between the planks. If the plywood was painted brown the gaps wouldn’t have stood out so much but I made the Mister pull up and reapply some planks and we used a brown sharpie for the smaller gaps.
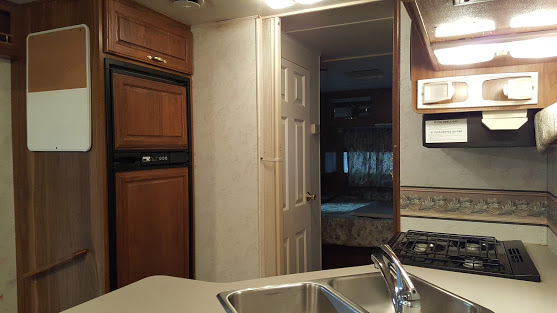
(Before view of kitchen and hallway to the bedroom.)
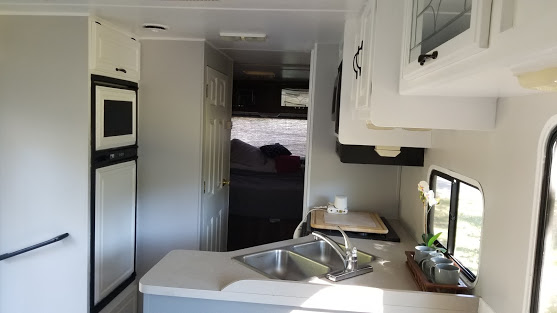
(View from the living room, through the kitchen and back through the bathroom hallway and into the bedroom. That area is next on the project list.)
The kitchen area is right off the main living room and can’t be ignored because it is a big part of the living space. Just like a real home the glamper kitchen is the heart of the home. The freezer was painted with chalkboard paint and we will be adding some press and stick subway tiles behind the stove top.
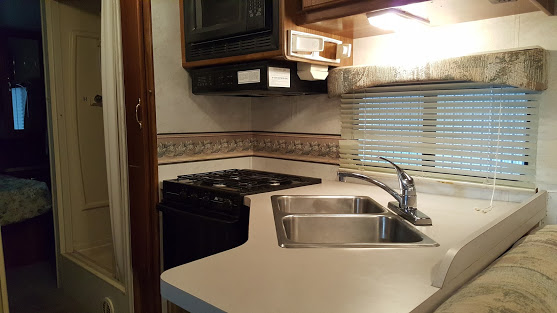
{Before pic of kitchen area with a horrible border that had to be removed with a heat gun.)
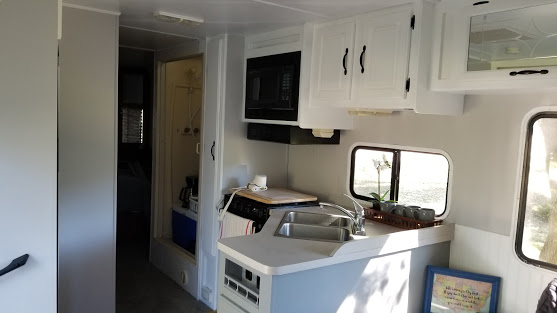
(In the background you can see that I currently use the disgusting shower as a closet.)
Next up on the glamper living room makeover was seating. Earlier in the year, we purchased an Ikea pull out sofa with a dark grey slipcover to play the dual role of seating by day and sleeping by night. I added a few throw pillows and a blanket to give a pop of red color to the room.
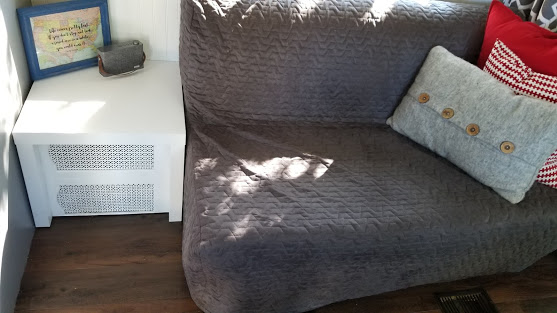
(I added shutters to the Ikea end table which hides our “furnace” and sits next to the Ikea pull out sofa bed.”)
Across from the sofa bed I added two chairs from our basement and the gate leg table I had in my stash of flea market finds. When it came to the chairs, for a long time we were unsure as to what chairs we were going to put in the camper. In the end, these chairs were given to me but need to be reupholstered. (That’s a future DIY project.)
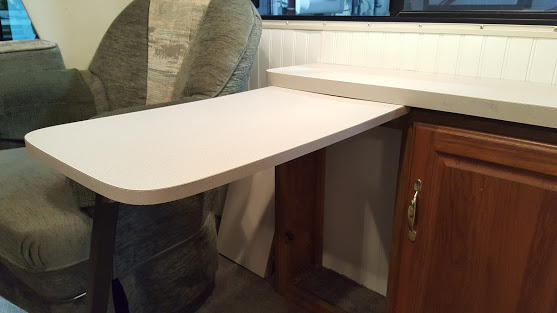
(Before pic of 1980’s disgusting, sage furniture and rickety fold out table.)
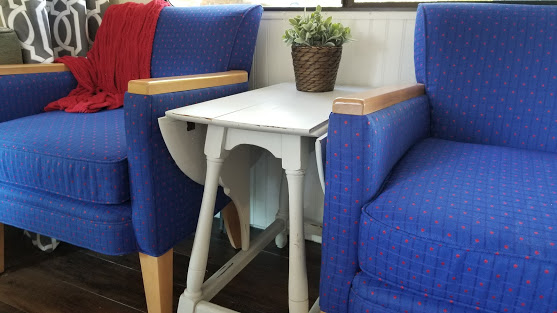
(After pic of living room chairs and gate leg table that is moved and expanded in the middle of the room and used a dining room table. Eventually I would like to make red slipcovers for the chairs.)
Artwork needs to be inexpensive and light enough to be attached to the wall with some velcro so it doesn’t fall off or rattle endlessly while driving. This vintage map letter B from the Movie Monday Challenge is the perfect artwork for the glamper. I also made the huge map art sign above the cab with my favorite quote and made with Sharpie markers.
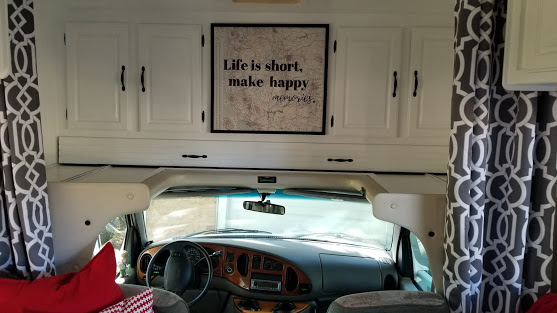
We didn’t get to finish everything on our “to do” list this time but you can bet I will be replacing all of these boring plastic lights with the next round of our glamper living room makeover. I bought the awesome dark grey curtains on Amazon, I am also going to make some privacy curtains for the front cab window and we still have to order pull down shades for the side windows.
With these updates I am amazed with how much a coat of white paint makes all the difference with the space. Everything looks bigger, better and so fresh. With that being said, scroll down and take a look at what my friends have done with their $100 room makeovers and let these ladies inspire you to get creative.


Is there a waiting list to sign up on to hit the road in your glamper!
I love everything about this. It looks like the perfect spot to nap and explore.
Haha….Lisa you are too funny! It is very comfy and I just might move into it permanently. LOL
Wow! Just simply WOW! You have really livened up the Glamper. I’m so excited for you…what wonderful times you will have in that beauty!
Yes, we have an agenda filled with short and long road trips planned. Very excited to hit the road.
I love love love the updates. That horrid fabric they seem to use on every piece of RV equipment has to go. Whoever designed it should be run out of the country. It’s really bad…. LOL
I love the curtains you chose, they really add an elegant touch and the white walls and cabinets are lovely.
I have a friend looking at updating their RV, how did you end up attaching the sofa and chairs to the body of the Glamper?
Thank you Toni. Isn’t that fabric and carpet absolutely disgusting? I need to start an interior design company for RVs. My husband saved parts from the furniture we took out and modified the new furniture to keep it from moving around. Like the little table that covers the furnace is attached to the wall with screws, some things are bolted down from underneath and some things just have non-skid feet attached.
Don’t feel bad!!! I went over a budget a little bit, too. 😉 I cannot even say how much I love your glamper!! I’d never want to leave!! Travel the entire country, I say!! Enjoy and make good memories… 😀 <3
Thank you Sarah. We have lots of travel plans on our agenda and I can’t wait to hit the road.
Your glamour is beautiful, a true home away from home!! I love your curtains and the pops of red. How on earth did you get the white paint to stick on the parts of the cabinets that aren’t real wood?
Thanks Susanne. The trick with the paint is to make sure you sand and prep before adding light coats of paint with primer and lots of drying time in between coats of paint.
Road Trip to HTX!!!!
Yes, on my road trip list.
When you swing by my neck of the woods, please slow down so I can jump on! I love this little glamper, it’s so cute! The cabinets white make a huge difference!
I will add you to my road trip map. 🙂
Oh, momma! I love it. I have always thought a glamper redo would be so fun!
We are having a lot of fun with this project.
Love all that you have done to your Glamper Denise!!! Hope you and your sweet family enjoy every minute and make lots of happy memories together on all your fun road trips!!
Thank you Sam. We are definitely making lots of happy memories.
This is a really great makeover, I love that you chose vibrant bright colours. So much better than the original, its a nice home now. It just happens to be on wheels.
This looks great, like a totally new place! Looks fun and inviting:) Thanks for sharing at Vintage Charm!
xo Kathleen|Our Hopeful Home
Denise, your glamper is beautiful! We’re getting ready to do ours too so I’m out snooping. 🙂 Question: did you have nasty fabric over the two wood pieces dividing the living area and the driving area? I can see in one picture that you’ve stripped it down to the plywood. What is the tape around the one edge for? And what did you end up covering it with? I’m planning to do white in ours too and thought maybe I’d put some sort of vinyl where the hideous blue suede is now. Thanks for sharing all your insight!
Thanks for stopping by the Bryant Chateau. The walls that divide the living room and driving area came covered in a white faux white leather. It is wrapped around the plywood on the cab side with a separate padded layer sandwiched to the living room side. In the picture you are referencing, that looks like tape, but it is the faux leather wrapped around the plywood. We took off the padded side of the covered plywood when doing the flooring. Those dividers are on our list of things to redo because they push against the cab seats and block them from reclining back further. I don’t know if the dividing walls are original or an added feature but they are definitely awkward and something that will be changed in the future.
Comments are closed.