
Today I am sharing my wicker rocker makeover along with my first attempt at the lazy way of painting fabric with homemade chalk paint. I seriously dislike projects that monopolize my time because I am so darn impatient. Paint drying is almost worse than standing in line at the DMV. Ugh!
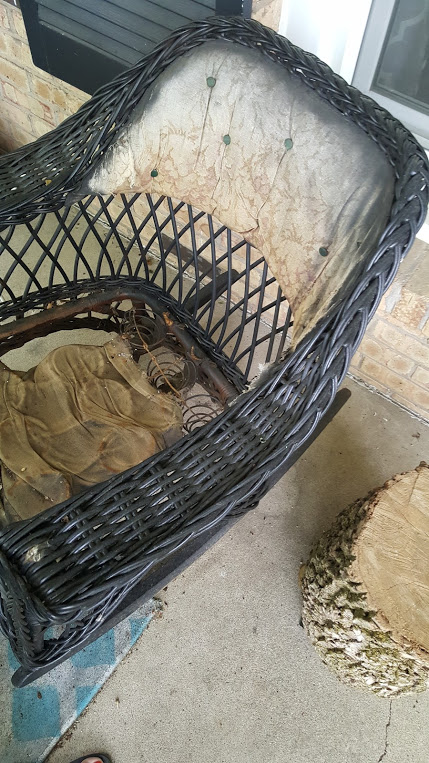
Have I ever told you that I have an addiction to chairs? Yes, it is true. I can’t pass up a good chair deal and that includes the broken chairs filled with character and charm like this wicker rocker. I picked up this beauty at the flea market for $10.
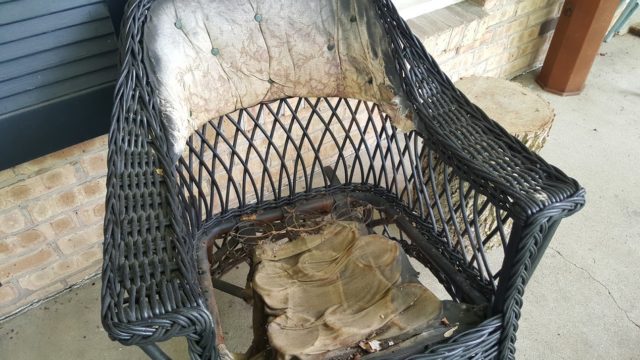
My ambitious plans for a quick furniture flip laid rest in my storage unit (aka basement) for over a year as the rocker patiently waited in line behind the future chair planter and the future chair bench. Did I mention I have an addiction to chairs?
Should we talk about all of the picture frames that cut in line before the wicker rocker makeover? Um, no. Let’s save that confession for another day.
Anyway, at the bottom of this post I am sharing the Farmhouse Hen projects that were made from something “broken and made new” again and I chose to feature my wicker rocker makeover because I painted the thrift store cushions with chalk paint. Yes, you read the right…PAINTED cushions.
Wicker Rocker Makeover with Chalk Painted Cushions
I have been wanting to test out the idea of chalk painting fabric but didn’t want to commit to a whole chair or couch because I don’t follow directions and I like to do things quickly. Anyone else work like that? Just a hunch but painting a couch seems like it would take a long time but I could be wrong. Just sayin.
Believe it or not, and much to my own surprise, this half-assed, lazy attempt at chalk painting fabric actually worked with minimal effort and supplies.
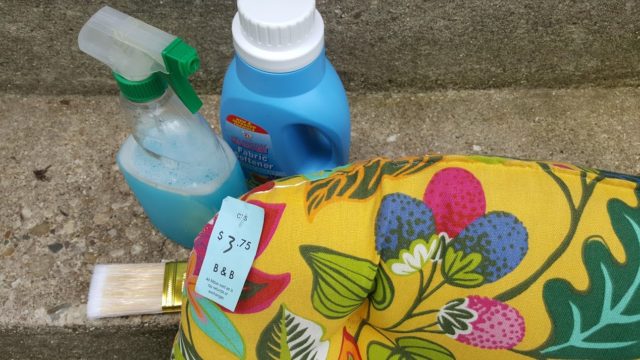
I’m no Martha Stewart and I certainly didn’t have time to seek out her fabric medium as recommended in all the Pinterest pins I studied glanced over. Therefore, I opted to buy some cheap fabric softener from the Dollar Store and dilute it with polluted tap water straight from Lake Michigan.
Pro Tip: A pro tip (because I am now calling myself a pro) for painting fabric with chalk paint is getting the fabric very damp with the fabric softener mixture and the chalk paint needs to be diluted as well. You want the paint to go on in thin layers and soak into the fabric to help avoid cracking. Guess how I know that?
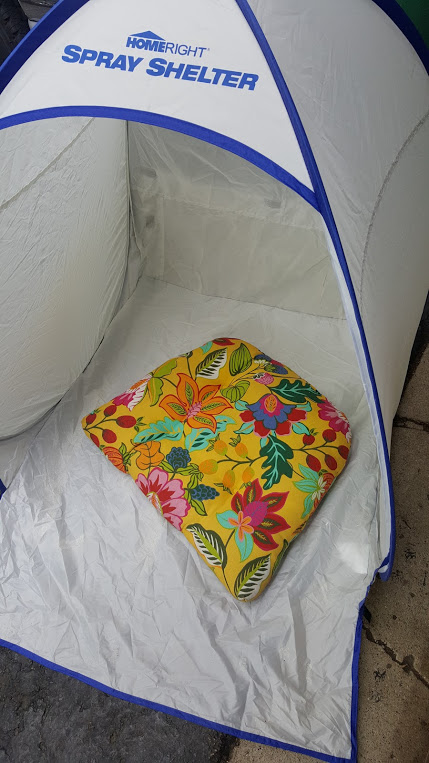
Don’t be fooled by that spray tent housing my cushion. I would have loved to use my paint sprayer for this project but I went the old fashion route and used a brush and cramped hand. I used the tent to keep Mother Nature from blowing leaves onto the wet paint. Yea, I have a bad history with Mother Nature and paint projects.
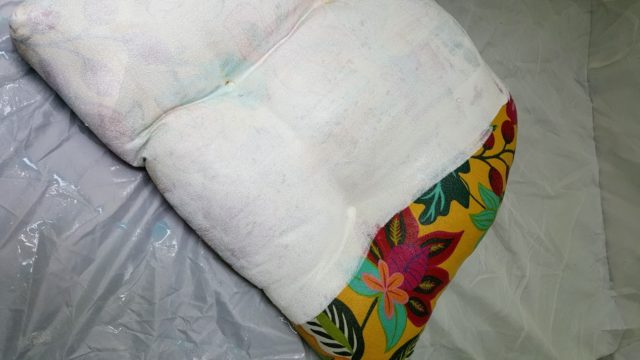
As you can see, the floral pattern is still showing through the paint after 1 coat of diluted paint. Patience is definitely not my best character trait but I was able to distract myself with another project in between coats. Plus chalk paint dries fairly quick so it wasn’t too bad layering 3 coats of paint onto the cushion.
Pro Tip: Another pro tip is to gently sand in between dry coats to remove any fuzz, pills or random debris that has attempted to derail your crafting efforts.
Alas, after 3 coats of diluted chalk paint and one layer of clear wax my wicker rocker makeover was complete. Well, almost complete. The true test was if this paint job would hold up well enough for me to rock and relax on my front porch and not walk away with paint chips stuck to my butt.
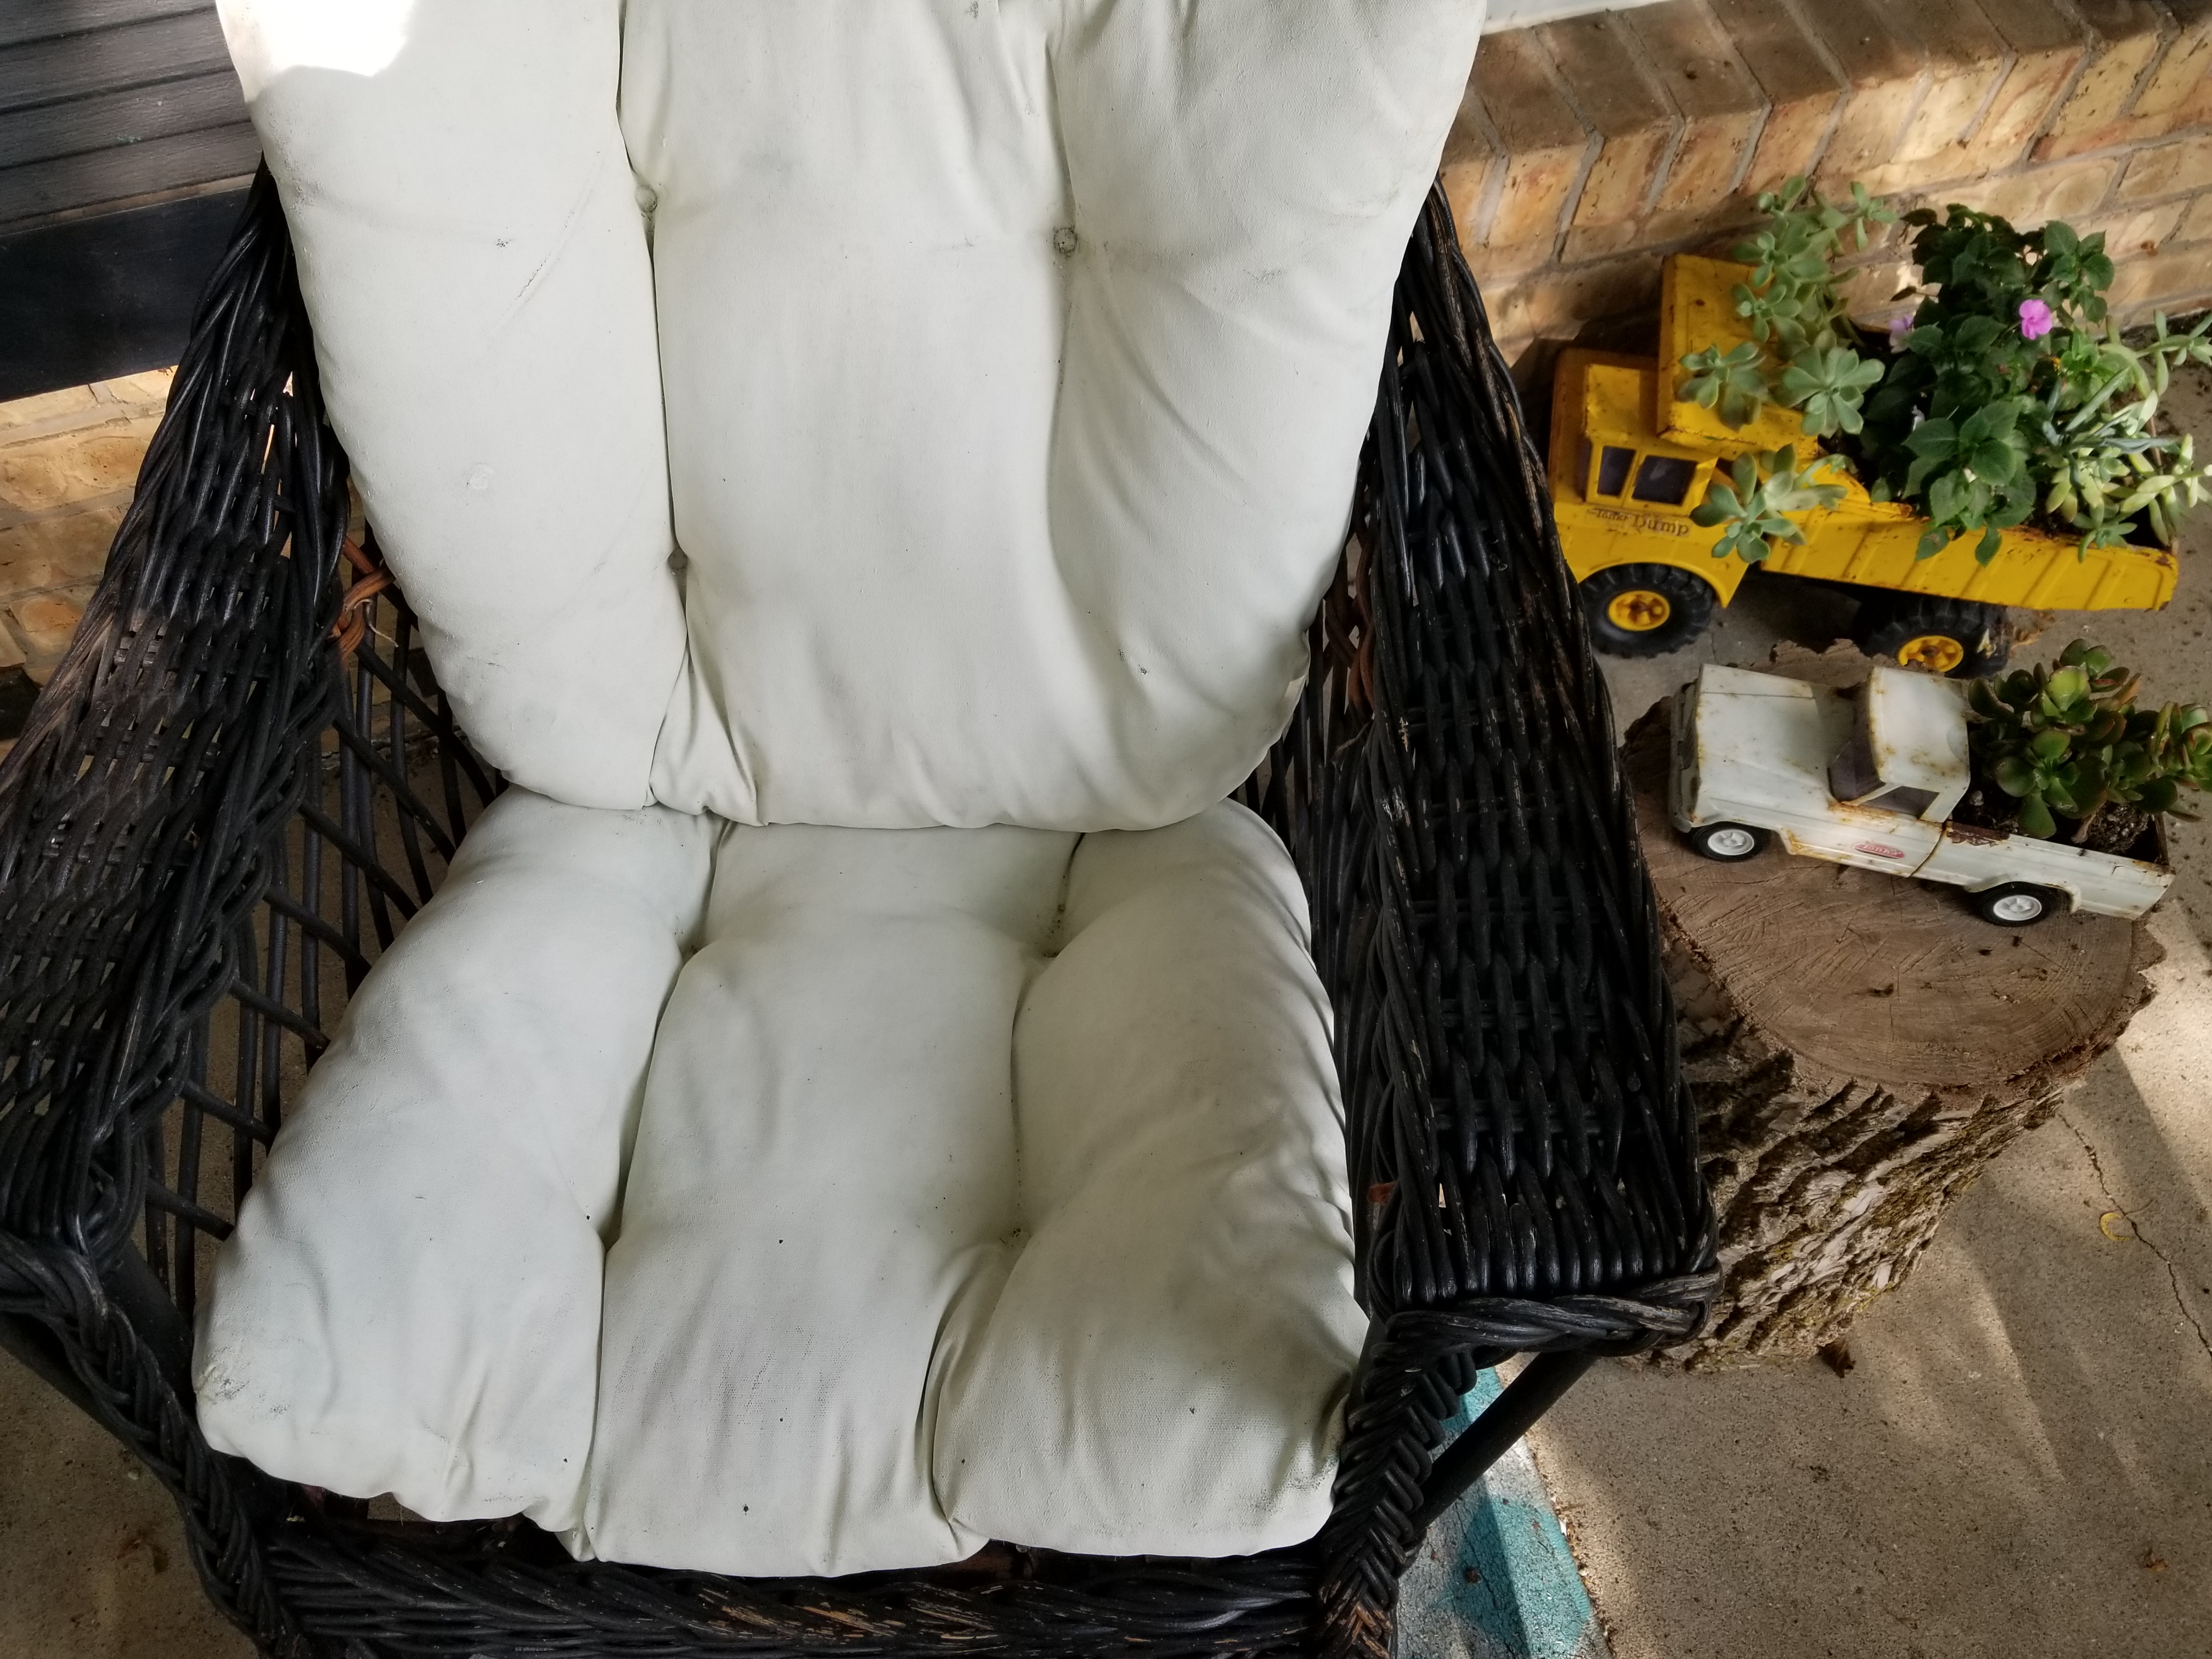
Ta-dah! Here is my wicker rocker one year post makeover.It has successfully made it through a full cycle of the mid-west change of seasons and passed the butt test. Other than some dirt that needs to be hosed off, it still looks pretty awesome if I do say so myself.
But if I am keeping it real here, my porch is dusty, dirty, disgusting, embarassing and I owe you a better pic when my life calms down. Then I am going to sit in that chair and rock myself to sleep.
Don’t forget to keep scrolling and visit the other Farmhouse Hens and all of their “broken but made new” projects.

Modify Your Vanity Drawers
Stephanie at Abbotts At Home! Blog / Facebook / Instagram / Pinterest / Twitter

Wicker Rocker Makeover with Chalk Painted Cushions
Denise at My Thrifty House! Blog / Facebook / Instagram / Pinterest / Twitter

Butcher Block Island Become Farmhouse Table
Michelle at Our Crafty Mom! Blog / Facebook / Instagram / Pinterest / Twitter

Broken Architectural Salvage
Sam at Raggedy Bits! Blog / Facebook / Instagram / Pinterest / Twitter

Broken Mirror Becomes A Bulletin Board
Leanna at FaeriesandFauna! Blog / Facebook / Instagram / Pinterest / Twitter

Hanging Solar Light Chandelier
Tarah at Grandmas House DIY!Blog / Facebook / Instagram / Pinterest / Twitter
Great job, what a beautiful old wicker chair. I think your chalk paint will hold up well.
I refinished some sling back patio chairs with chalk paint last year, and they sat outside in the Canadian winter and they were just fine. No chipping or wear at all after one year.
That looks like the perfect chair to rock away the seasons. Love how it turned out Denise. I’ve always been a little weary of painting wicker. It seems like such a hassle, but I think I’ll give it a shot after seeing how yours turned out
This turned out awesome!!!!!
Great makeover! The wicker looks brand new again!
What a fabulous makeover!! Bet you love relaxing in it and enjoying all of your hard work!! I LOVE your truck planters too! So cute!!
That was a great idea. Painting the cushions and saving $ it is ready to enjoy. Great project. I purchased a chair yesterday at a thrift store because I am obsessed with chairs too. Have a great week, Kippi
Comments are closed.