Each month I team up with my blogging friends and share a craft project with you made from supplies I have been hoarding collecting. We call it the Craft Room De-Stash Challenge. After you learn all about my DIY glittered candle jars and vases you will be treat to some awesome creative inspiration from my crafty friends.
I love DIY projects that are cheap, easy and fun. {That sounds so wrong but really this DIY project is good, semi-clean fun.} These glittered candle jars and vases checked all those crafty boxes plus glitter just makes them extra fun. Really, I love taking something that was headed to the trash or ready for the thrift store and giving it a new life as something unexpected and fun.
 Over the years, I had unintentionally started a collection of plain glass vases and several mason jars too. Rather than get rid of them I decided to recycle, repurpose and reuse them to add some sparkle to my decor.
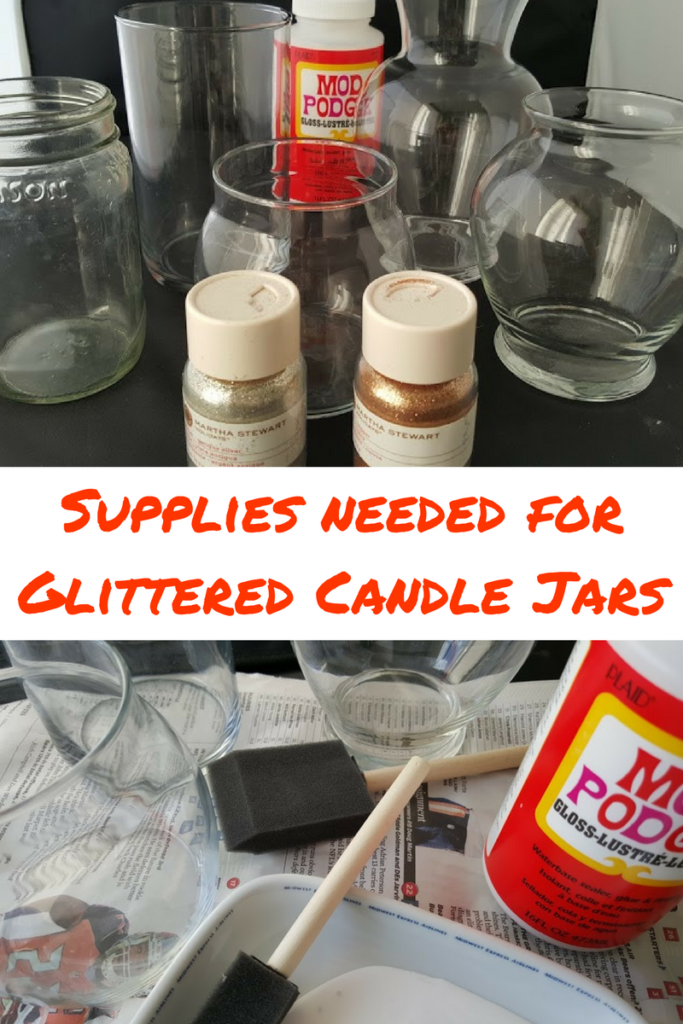
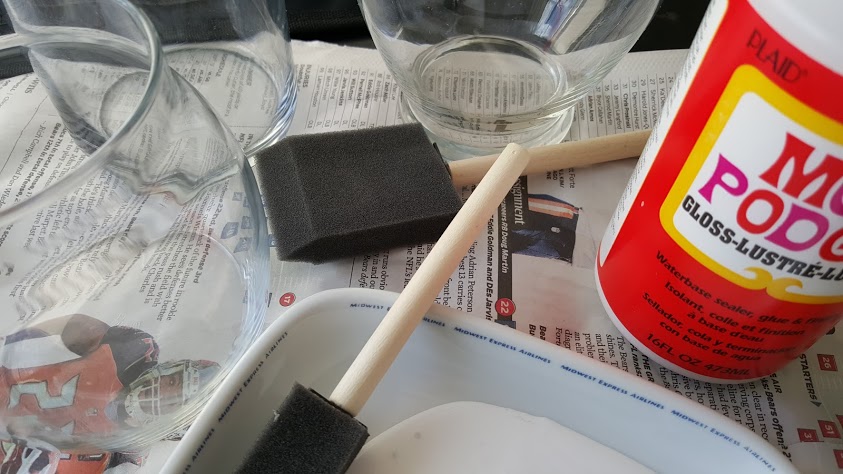
Supply List for Glittered Candle Jars and Vases {Affiliate dislcosure here}
- Glitter {any color, fine or chunky}
- Variety of glass jars and vases
- Mod Podge {or glue}
- Sponge brush
Take yourself back to your glitter and glue days in kindergarten and smile because glitter makes happy memories. When I said this DIY project was easy I wasn’t kidding.
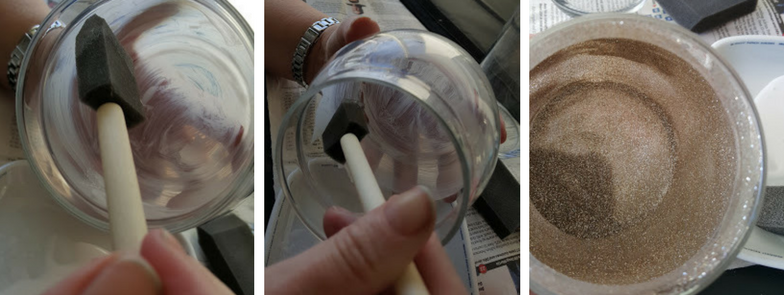
Pour some Mod Podge on a plate and dip your sponge brush in for a thin scoop of stickiness. Starting at the bottom and working your way up the sides, paint the inside of your jar with an even layer of the Mod Podge . Don’t worry, the Mod Podge will go on white and dry clear.
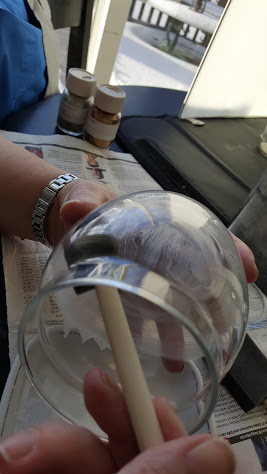
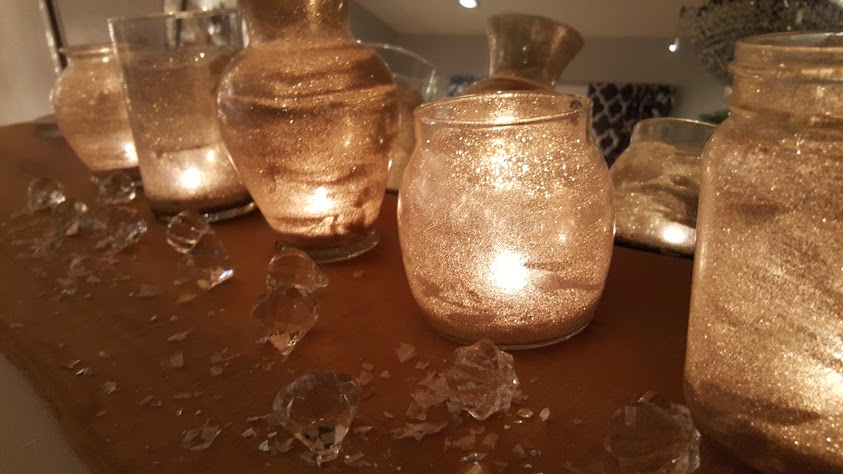
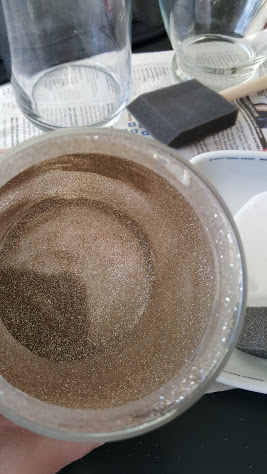
Once you have the inside covered with an even layer of Mod Podge, start pouring some glitter into the bottom of the jar. Roll the jar on it’s side and let the glitter roll around the sides and stick to the Mod Podge. For my jars I used a fine, silver glitter that had been in my craft room for a very long time however, next time I glitter some jars I am going to do a chunky gold glitter for more SPARKLE.
After you are done glitter-fying of your jars, let them dry for about 30-45 minutes. Don’t forget that the Mod Podge will dry clear so that is a clue to when the vases are done. Add a tea light candle, dim the lights and enjoy the glittery glow. I love the swirl of where the glitter is thicker in some areas than others.
I have a ton of jars hanging around my house & storage trailer. My grandmother-in-law likes to send all the jars she saves to me as well. I finally had to tell her I was full of jars! I’m thinking I’ll try some rainbow swirl ones like this….I have a little glitter collection too!
Oh I would love to see a rainbow swirled jar. Great idea. Thanks for visiting Kristie.
For some reason, I have been collecting jars so this is a good project to do something with them. They are so pretty, I bet they are beautiful at night.
Lots of sparkle when the candles are lit. Thanks for visiting.
That is cute as can be! Your process reminds me of buttering and flouring cake pans! Same procedure, right? The jars are pretty and I see what you mean with the extra swirly places.
Yes, just like flouring a cake pan. Thanks for visiting.
OK I had a facepalm moment when reading this post. Of course! It makes so much more sense to apply the glitter to the INSIDE of the jars. hahaha Thanks for the tip 🙂
Haha….yes, keeps the glitter from falling all over the place. Thanks for visiting.
Ohhhhhhh sparklies, I <3 sparklies! What a wonderful project. I am sure I'll be making it soon. Thank you for sharing this idea!
Who doesn’t love sparkles? 🙂 Thanks for visiting.
Very very pretty! Thanks for sharing your tutorial, I think I have everything I need to make my own, they’d be great for Christmas wouldn’t they. I bet kids could even help make them, and they could proudly give them as gifts. Pinning 🙂
Yes, they go well with all my Christmas decor and I use them as part of the centerpiece on my table. Thanks for visiting.
So so gorgeous!!
Thank you Deborah.
Turned out so cute!! Great use of supplies you already had. These would be so cute during Christmas too!
Yes, I use them with my Christmas decor on the table or sometimes on the mantle.
Very pretty upcycle – I’m the same way, I have a crazy collection of clear glass vases!
So glad to know I am not the only person that hoards glass jars and vases. 🙂
OMG I haven’t worked with glitter in a long time. I love it but it can be messy. These turned out amazing. I love that you are up-cycling the jars into something pretty and useful!
Thanks Michelle and putting the glitter inside the jars makes it less messy!
I love the colors you used and after seriously it looks wwwoowii
Thank you so much. I love the sparkle too.
I love how these turned out! So pretty! Thanks for linking at The Gathering Place!
So glad you liked them. Thanks for visiting.
What a great idea! I love any project with glitter and Mod Podge! You just can’t go wrong with those two!
Anything with glitter is awesome in my book!
They sure look lovely Denise and I;m with on the swirly bits. It makes it look like a glitteryfied milky way. So pretty
Comments are closed.